Completing Microcement Surfaces Separately
We understand it isn’t always possible to complete all of the microcement surfaces at the same time.
Here is our guide to completing microcement surfaces in separate sections without compromising the performance or appearance of your work.
Never Stop Applying Microcement Halfway through a Surface
Microcement is intended to be applied seamlessly. If you stop halfway through a surface, let it dry & then complete the rest of the surface later, you will find it very hard to blend the 2 sections seamlessly.
For this reason, we always recommend completing a surface fully before stopping.
Complete the surface up to each edge before breaking away.
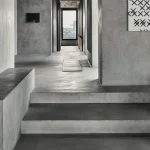
How about Adjacent Surfaces?
Adjacent surfaces e.g. Walls & Floors or Adjacent Walls can be completed separately.
Work up to internal corners then run your finger or a corner trowel along the line of the corner, to squash the product into the corner & remove any excess.
The same applies to external corners, work up to the edge, then trowel a small amount of product onto the adjacent wall, to ensure there is no excess product left on either surface.
Trowel away from the corner into both directions to flatten the microcement in both directions.
Avoid Open Edges in Wetrooms & Bathrooms
For bathrooms & wetrooms, it’s crucial that there are no gaps in the microcement for water to get behind.
If you can’t complete the full room in one application, trowel the microcement along one surface up to an adjacent surface, run your finger or a corner trowel along the line of the corner, to squash the product into the corner & remove any excess.
Then trowel away from the corner into both directions to flatten the microcement. Make sure there is a lip of at least 100mm on the surface that you will be applying microcement to later. This will ensure that you have full seamless coverage without open edges that water could get behind.